Jetson AGX Xavier Development Kit: Setup
Summary
This is a guide to set up the Jetson AGX Xavier Development Kit. After this guide the user will be able to connect with SSH and VNC. This guide will also show the installation process of TensorFlow and Keras for AI-Research purposes.
Requirements
- Operating system: Ubuntu 18*
- Software: Nvidia SDK Manager https://developer.nvidia.com/nvidia-sdk-manager
*Depending on the desired JetPack version different Ubuntu versions are required.
- JetPack 4.x requires Ubuntu 18
- JetPack 5.0 requires Ubuntu 20
In order to complete these steps, you must install the required Software before.
Description
Step 1 - Connecting the Jetson AGX
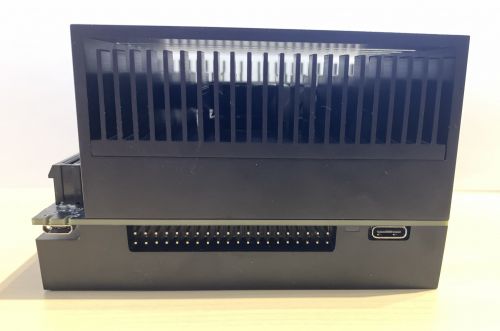
- To start setting up the Jetson AGX Xavier Development Kit, you need to connect it to your host computer using the included USB-C to USB-A cable. This cable has to be connected to the USB-C port on the front side of the Jetson AGX.
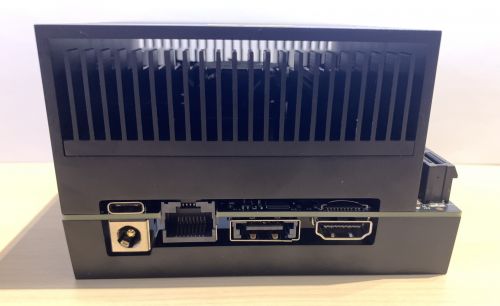
- Next, connect it to your local network using the Ethernet port on the back side. On this side also connect a monitor using HDMI and keyboard/mouse using USB-A. If you need a second USB-A port, an USB-C to USB-A adapter is included which can be plugged in to the USB-C port on this side.
- Finally, connect the Jetson to the power supply.
Step 2 - Installing the JetPack
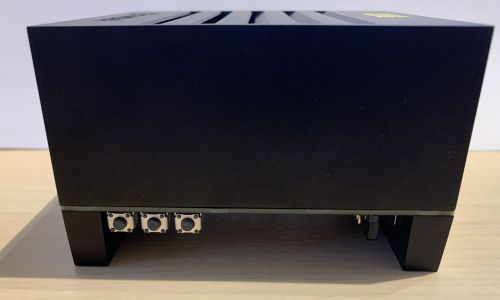
- To install the JetPack, you need to bring the Jetson AGX into force recovery mode. To do this, press and hold the force-recovery button (middle button). Then press the power button (left button) and release both buttons.
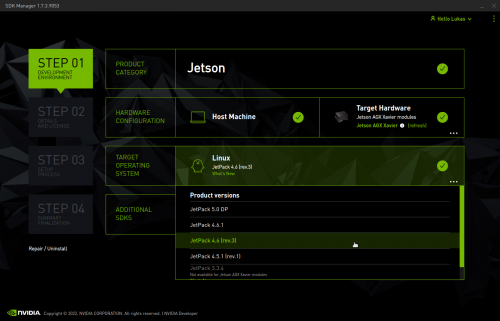
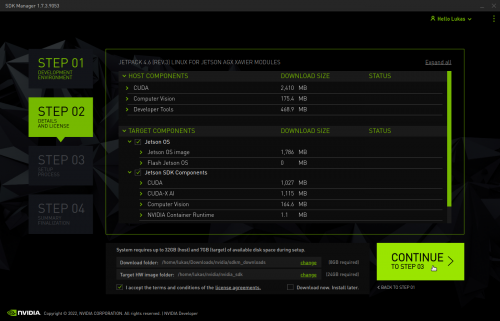
- Start the Nvidia SDK Manager on your host computer, make sure that the Jetson AGX is detected and choose your desired JetPack version.
- On the next page you can choose if the SDK Components should be installed, which is the default. Make sure you have enough disk space available on your device and click continue.
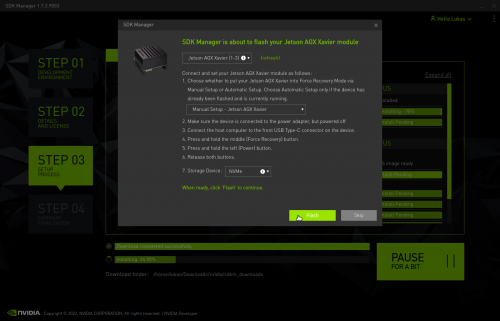
- When the SDK manager is about to flash the OS to the Jetson AGX, choose Manual Setup to put the device into force recovery mode (as it should already be) and choose the storage device it should be installed to.
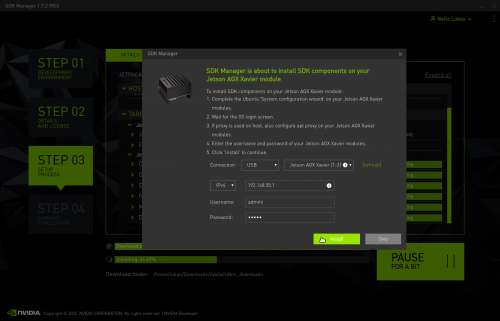
- During the installation, you need to complete the Ubuntu configuration on the Jetson AGX using the connected monitor and keyboard/mouse.
- Afterwards, enter the chosen username and password in the SDK Manager to allow it to complete the installation.
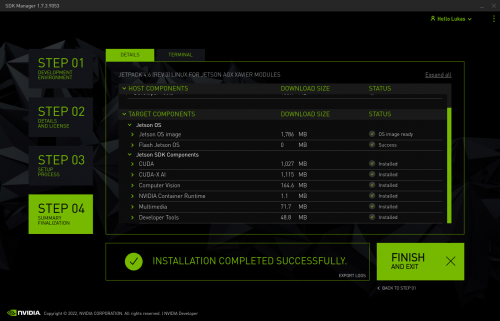
- After the installation is completed, you can connect to the Jetson AGX using SSH.
Step 3 - Enabling VNC
To enable VNC, run the following commands as provided by Nvidia:
- Enable the VNC server to start each time you log in
mkdir -p ~/.config/autostart
cp /usr/share/applications/vino-server.desktop ~/.config/autostart
- Configure the VNC server
gsettings set org.gnome.Vino prompt-enabled false
gsettings set org.gnome.Vino require-encryption false
- Change the desktop resolution
If no monitor is connected to the Jetson AGX, the default resolution (for VNC) is 640x480
To change this, append the following lines to /etc/X11/xorg.conf
Section "Screen"
   Identifier    "Default Screen"
   Monitor       "Configured Monitor"
   Device        "Tegra0"
   SubSection "Display"
       Depth    24
       Virtual 1280 800 # Modify the resolution by editing these values
   EndSubSection
EndSection
- Reboot the system
sudo reboot
Note: You can only connect to the VNC server after logging in to the Jetson locally. To be able to always use VNC enable automatic login in the Ubuntu system settings on the Jetson AGX.
Step 4 - Installing TensorFlow and Keras
Nvidia provides a custom TensorFlow package, which requires the installation of some dependencies first (https://docs.nvidia.com/deeplearning/frameworks/install-tf-jetson-platform/index.html#prereqs).
- Install required system packages
sudo apt-get update
sudo apt-get install libhdf5-serial-dev hdf5-tools libhdf5-dev zlib1g-dev zip libjpeg8-dev liblapack-dev libblas-dev gfortran
- Install/Upgrade pip3
sudo apt-get install python3-pip
sudo pip3 install -U pip testresources setuptools==49.6.0
- Install python packages
sudo pip3 install -U --no-deps numpy==1.19.4 future==0.18.2 mock==3.0.5 keras_preprocessing==1.1.2 keras_applications==1.0.8 gast==0.4.0 protobuf pybind11 cython pkgconfig packaging
sudo env H5PY_SETUP_REQUIRES=0 pip3 install -U h5py==3.1.0
- Install TensorFlow
sudo pip3 install --pre --extra-index-url https://developer.download.nvidia.com/compute/redist/jp/v46 tensorflow
Note: This command installs the latest available TensorFlow version for the specified JetPack version. If you installed a different version, you need to change the URL: e.g. /v46 for JetPack 4.6, /v461 for JetPack 4.6.1, /v50 for JetPack 5.0
- Install Keras
sudo pip3 install keras==2.5.0rc0
Note: Depending on your installed JetPack and TensorFlow versions you might need a different version of keras.
Used Hardware
References
- Jetson AGX Xavier Development Kit User Guide https://developer.download.nvidia.com/embedded/L4T/r32-3-1_Release_v1.0/jetson_agx_xavier_developer_kit_user_guide.pdf
- NVIDIA SDK Manager Installation Guide https://docs.nvidia.com/sdk-manager/download-run-sdkm/index.html
- Tensorflow Installation Guide https://docs.nvidia.com/deeplearning/frameworks/install-tf-jetson-platform/index.html#prereqs
