Philips Hue Bridge 2.0: Install, connect and set up Philips Hue
Summary
The Philips Hue lighting system gives smart home users the ability to use predefined lighting scenarios. Wake up gently with a sunrise despite rain and grey clouds? No problem with the Philips Hue Ambiance lighting system. In our guide, we show you how to connect the Philips Hue Bridge to your router, set up the Hue app and manage your Philips Hue lamps.
Requirements
A Philips Hue starter set offers a perfect introduction to your personal lighting arena. The White and Color Ambiance starter kit contains, for example, three LED lamps for standard household E27 sockets, the Hue Bridge base station and a Hue dimmer switch. The dimmer switch can also be used as a remote control for the smart lamps.
The following is required:
➤ A Philips Hue Bridge, which is the heart of the Philips Hue lighting system
➤ Working WLAN for wireless communication between the Hue Bridge and the smartphone
➤ A smartphone to install the Philips Hue App
➤ A Philips Hue LED light that will later be coupled with the Hue Bridge
➤ A working Internet connection to register the Hue system on the Philips website
Preparations
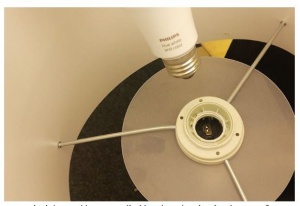
Step 1: Screw the Philips Hue lamp into the lamp socket"
To start the set-up, turn the Philips Hue lamp into a regular lamp socket. There are Hue lamps in the common E27 socket, but also some versions in E14 and GU10.
Step 2: Coupling the Philips Hue Bridge with a router
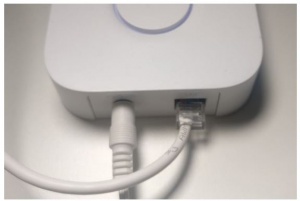
After that the Hue Bridge has to be connected to the power supply. As soon as it is connected, the Bridge switches on automatically. Once this is done, the bridge is connected to a WLAN router using the Ethernet cable provided. Simply plug the cable on the right into the connector labeled "WLAN" on the bridge and the other end into a free Ethernet slot on the router. As soon as the three lights on the top of the Hue Bridge light up, the Hue base station is automatically connected to the Hue lights.
1. Powering the Philips Hue Bridge and connecting routers
2. Once the lamps are connected, all three LEDs on the Philips Hue Bridge light up
3. Download the Philips Hue app (Android/iOS) and find the bridge in the menu
4. Press the big round button on the Philips Hue Bridge to confirm the connection between Philips Hue App and Philips Hue Bridge
5. The luminaires can then be assigned and named to the rooms using the app
Step 3: Connect Philips Hue lights to the Hue app
Now it's time to download the free Hue app (Android/iOS) and install it on your smartphone or tablet.
After installation, the app automatically searches for the Hue Bridge and then, after pressing the on "Setup", prompts the user to press the large round button on the top of the Hue Bridge's case. The connection will then be established automatically. The app then displays the LED lights paired with the Hue Bridge.
With the Philips Hue app, the full potential of the Philips Hue lighting system can be exploited: using pre-configured lighting scenes such as sunset, tropical twilight or northern lights, the atmosphere of a room can be changed at the touch of a finger, or you can simply use your own creations. Each Hue luminaire can be controlled individually via the app. If there are several Hue luminaires in a room, they can be grouped together and then controlled simultaneously under one room name in the app. To fully enjoy the benefits of lighting control with Philips Hue, however, it is necessary to create a user account on the
My hue website, otherwise the user is limited to basic functions.
What is compatible with the Philips Hue Bridge?
The Philips Hue Bridge is the intelligent control center of the Philips Hue lighting system. It serves as an interface between the connected systems and devices and a smartphone.
Philips Hue Bridge is compatible with the following solutions:
➤ Connect the Philips Hue Bridge Smart Home to systems like Amazon Alexa, HomeKit or Google Assistant
➤ Control of foreign brands such as IKEA TRÅDFRI light bulbs or smart IKEA TRÅDFRI socket
Conclusion on the installation of the Philips Hue lighting system
Philips has landed a real hit with its lighting control Hue. Although the Hue Bridge requires an additional hub, which again requires a socket and standing room, it greatly simplifies the management of the lamps and also makes it easier to set up Hue lamps throughout the house and later link them to third-party systems such as Amazon Alexa.
Used Hardware
- Philips Hue Bridge 2.0, Gateway
- Philips Hue White and Color Ambiance Single LED-Bulb E27 10W
- Philips Hue White LED E27 9.5W/827, white
- Philips Lighting Hue motion sensor

