Practical stored XSS Example using Burp Suite
Summary
This practical guide shows how to execute a stored XSS exploit using burp suite.
Requirements
- Burp Suite
- Visual Studio
- GIT Project (https://github.com/Robert-Haidl/XSS_stored)
In order to complete these steps, you must have followed the readme [1] before.
Description
Setup
- Download Burp Suite (https://portswigger.net/burp/communitydownload)
- Clone GIT Project and run it locally using VisualStudios integrated IIS Express server.
- Check if you can add blog entries
Step 1
Open Burp Suite, navigate to Proxy -> Intercept and make sure to turn Intercept on.
Step 2
Click on "Open Browser" in order to open the integrated Burp Suite browser. Once the browser started (it takes a while), open the add-entry.html file in it.
Step 3
As the interceptor is turned on, all requests from the client to the server are intercepted.
All requests need to be forwarded, til the website has loaded completely. (Click on Forward)

Step 4
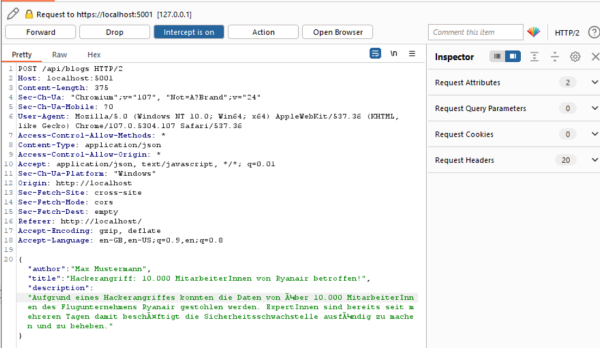
Once the website has loaded, fill out the form with data and submit it. Now you can see, that the client sends a POST request to the backend with the content of the form in JSON format.
Step 5
As the transmitted data in the POST request is not validated on server side, you can change a parameter of the JSON to arbitrary JavaScript code.
In this tutorial we change the 'description' parameter to the following JavaScript code
<script>alert('XSS Code Injection')</script>
and then forward the request.
Step 6
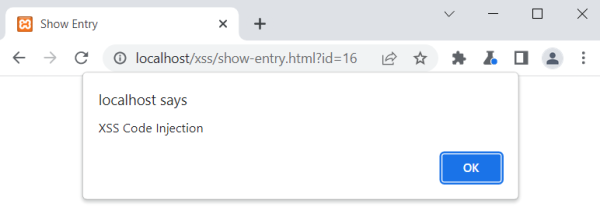
Once you submitted the form and forwarded the request to the server you need to either turn off the Interceptor because you have already sent the malicious code to the server (where it has been saved to the database) or forward all requests. After that you will be automatically redirected to the show-entry.html file where the malicious code is loaded from the server (DB) and executed on the client browser.


