Rubber Ducky Detector
Summary
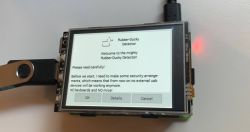
This article serves as documentation for using the Rubber Ducky Detector developed by students of the FH Campus Wien. The Rubber Ducky Detector is a program running on a Raspberry Pi 4 Model B 8GB using RasPi OS that helps diminish attacks conducted with hotplug attack tools like the Hak5 Rubber Ducky. The Rubber Ducky is visually indistinguishable from a regular USB Stick, and pretends to be a Human Interface Device (HID) able to mimick keystrokes. The keystrokes can be pre-programmed in a custom payload. For further reference, see the detailed documentation for Hak5 Rubber Ducky.
The Rubber Ducky Detector is designed to run on an isolated system and provides a point where users can check unknown USB devices for maliciousness safely. After plugging in a device, the program checks if it is a Rubber Ducky. In case it is a legitimate USB drive, the Rubber Ducky Detector additionally checks for malicious file extensions and references the ClamAV anti virus library to check for infected files.
Requirements
- Hardware: Raspberry Pi 4 4G Model B or Raspberry Pi 4 Model B 8GB
- Operating system: Pi OS (32-bit) with desktop, or alternatively this custom image with pre-installed utilities and configurations
- Screen: JoyIT 3.2" Touchscreen Display or regular HDMI-able screen
- Flashing Tool: RasPi Imager
- Packages:
g++ libusb-1.0-0-dev clamav libclamav-dev libgtkmm-3.0-dev
Usage
Setup
- Download the custom image. If the official RasPi OS image is to be used, skip to step 2.
- Use the RasPi Imager to flash the image on a connected SD card. For the official RasPi OS distribution, click "Choose OS" and select the topmost option Raspberry Pi OS (32-bit). For the custom image, scroll down and select the "Custom Image" option to select a custom image file. Select the connected SD card and initiate the flashing process.
- Upon completion of flashing, insert the SD card into the Raspberry Pi, connect screens, and boot it up.
- The custom image should initiate the Rubber Ducky Detector program automatically upon startup. It uses the credentials
username: pi
password: duckyDetector
For the official distribution only, complete the setup process, open a terminal and clone the repository with the command
git clone https://git.fh-campuswien.ac.at/sisch/ducky-detector.git
then run the installer script
sudo ./install.sh
The installer script installs all required dependencies automatically and offers optional configuration of the touchscreen and an autostart functionality. If permission to run the script is denied, make the script executable by entering the command
sudo chmod +x install.h
After completing setup, enter the ducky-detector directory and compile the program by entering the command
sudo make
When the compilation is finished, run the program by typing
./DuckyDetector
Attention! Unplug all connected USB devices before initiating the scanning process.
Step 1: First Periphery Scan
To scan a device, press 'OK' to initiate the process. After that, insert the USB drive, and press 'OK' again. If the connected device is an HID, the tool will cancel the scanning process and warn the user.
Step 2: Second Periphery Scan
After passing the first check, the program will check for additional partitions on the device, and warn users if multiple partitions or file systems are detected. Press 'Details' for further information.
Step 3: Partition Analysis
If The Periphery Scan is complted and no critical Interface was detected, the Rubber Ducky Detector will check for malicious hidden partitions on the USB Stick. If the
Step 4: File Extension Analysis
If all periphery scans are passed, the Rubber Ducky Detector analyses the file extensions of all files contained on the USB drive, and check for extensions with possible malicious consequences like executables. Press 'Details' for further information.
Step 5: Malware Analysis
To scan the device for malware, a ClamAV Engine is created that subsequently accesses an online database to downloads signatures. It then checks the files against these signatures to detect infected files. Press 'Details' for further information.
Further Development
The project is hosted on GitLab. The GUI has recently been updated to be easily editable by using the tool Glade. The GUI is optimized for a small touchscreen, but can easily be edited and upscaled by using Glade. To edit, open the duckyDetector.glade file in Glade. To view applied changes in the actual running program, no recompilation is necessary as the application pulls the data from the Glade file at runtime.
Used Hardware
