Saleae Logic Analyzer Setup
Revision as of 13:33, 20 February 2023 by FPaschinger (talk | contribs) (Created page with "== Summary == This article shows how the Saleae Logic Analyzer is set up. == Requirements == * Operating system: Windows 10 * Software: Logic 2.4.4 (or newer versions) == Description == === Step 1 === Download the software for analyzing the traffic captured on the digital circuit: * Go to https://www.saleae.com/downloads/ * Click on "Download for Windows" * The download starts automatically * Follow the instructions of the installation wizard === Step 2 === * C...")
Summary
This article shows how the Saleae Logic Analyzer is set up.
Requirements
- Operating system: Windows 10
- Software: Logic 2.4.4 (or newer versions)
Description
Step 1
Download the software for analyzing the traffic captured on the digital circuit:
- Go to https://www.saleae.com/downloads/
- Click on "Download for Windows"
- The download starts automatically
- Follow the instructions of the installation wizard
Step 2
- Connect the wires with the logic analyzer
- The black wires represent GND which are connected to the lower part of the channels
- Connect the Logic Analyzer via USB to the PC or Laptop
Step 3
- Open the Logic 2.4.4 (or newer versions)
- The device should connect automatically
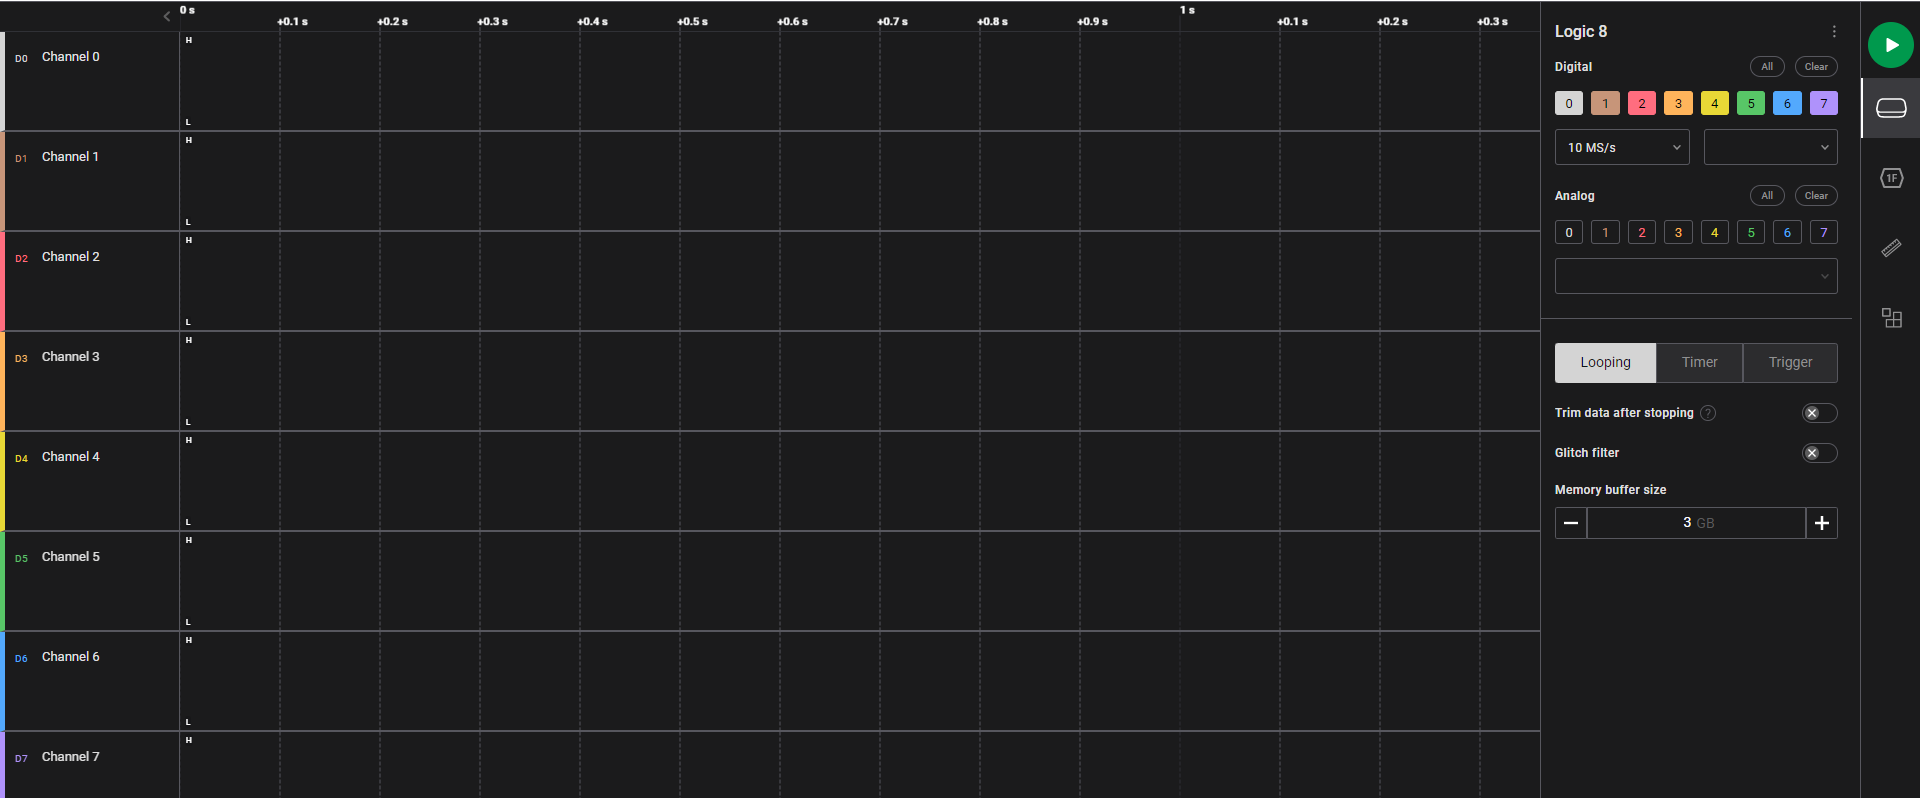

On the right side the 8 channels are listed with colored backgorunds. In this case the Saleae Logic Analyzer 8 provides 8 channels of which each channel can be activated/deactivated individually by clicking the corresponding button. On the navigation bar of the software the category "Capture" is found. When clicking on it, the option "Start/Stop Capture" is shown. After clicking "Start/Stop Capture" the analyzer starts capturing.
