VirtualBox: How to Setup your Malware Analysis
Summary
This documentation will provide you with a step-by-step guide to creating a virtual machine over VirtualBox. Though, we will not create a generic VM! This VM will provide you with a completely non-detectable environment for Malware Analysis.
As advanced malware nowadays is able to detect its environment (e.g. scanning for RAM, CPU cores, disk space, registry keys and even drivers) they are now able to stop their execution if they detect a virtualized environment. Therefore it is critical to setup your malware analysis VM correctly.
In order to render your VM undetectable, we have chosen two state-of-the-art tools on Github. One only supports Windows as its host OS and the other is relying on dependencies only available on Ubuntu. Though we will use Windows 7 on both as the host VM as it is the most popular for malware attacks.
How to read this documentation
As I wanted to keep everything neat and tidy, I opted to merge my screenshots into bigger screenshots. The screenshots are to be read from left to right and you will probably have to enlarge the picture in order to decipher all configuration options. In addition keep in my, the picture show all configurations that need to be tweaked. There will be some steps not documented, which means to keep the default configuration there.
Requirements
- Host Operating System: Ubuntu 16/18.04 or Windows 7/10
- Guest Operating System: Windows 7 Home Premium 64-Bit
- Software: VirtualBox 6.0.14
- Tools for VM-hardening: VBoxHardenedLoader (for Windows) and antivmdetection (for Ubuntu)
- Tool to check hardened VM: Pafish
- Tool to simulate network: FakeNet
The Tools
Before diving into the setup, here is a quick guide on what FakeNet and Pafish are and how to use them.
FakeNet
Unfortunately, Pafish does not scan for a working network connection. Nonetheless, this does not exclude advanced malware from scanning for it. In addition, in order to analyze sent packets by malware, you would need to extensively mimick a fake network. For this and we have the simple approach of using FakeNet. It allows you to intercepts and analyze the packets (all traffic is stored as .pcap files). "Installing" the standalone executable is straight forward. You download it from FakeNet/Releases and run the program as administrator on your VM.
For our case, we did not need to configure anything different than default. But to tailor it to your needs simply copy the default-config file at "configs\default.ini" and start creating your own. When finished simply start FakeNet with "-c FILE" flag and you are good to go!
Pafish
Pafish is a vm detection tool. It performs checks on its environment to detect whether it is run in a virtual or supposedly real system. The checks include the following:
- Generic checks
- RAM
- Application-specific checks
-
Sandboxing on Windows
Before we start, make sure you have downloaded the following:
- Windows.iso
- VirtualBox
- VBoxHardenedLoader
- Pafish (recommended)
- FakeNet (recommended)
Regarding Pafish and FakeNet we recommend you to download them beforehand and make your own windows.iso that includes both. This will enable you to just drag and drop both from the virtual Windows installation CD on your VM, without the need to have a functioning Internet connection and download them.
Installing VirtualBox
The first step is to install VirtualBox. During the setup, we have to prevent it from installing the network drivers as they provide a weak point malware likes to scan for. After, finish the setup with the remaining configurations on default.
Basic VM setup
Having installed VirtualBox you should see the home screen with a button to create a new virtual machine and settings.
As seen in the screenshots above (goes from left to right) we have assigned our VM the name 'win7' and chose the default path to save it. Next, we again chose the default options (VDI, because we will only use this disk with VirtualBox). The critical configuration here is the allocated disk and RAM size. Most advanced malware and our checking tool (Pafish) scans if your disk has less than 60GB and 2GB of RAM. So we advise you to set the disk to at least 64GB (recommended is +80GB) and RAM at least 2GB.
Advanced VM setup
After finishing the basic setup VirtualBox will have created your VM and is able to start it. However, before you do, we still have to configure some more options. Thus, go to 'Settings' (for your VM, in our case it is 'win7'). Here, make sure to have the Drag'n'drop and Clipboard sharing disabled. If one of them is active it means that you have VirtualBox Guest Additions installed. This leaves you with many more vulnerabilities that advanced malware can scan for then with benefits.
Next up, make sure you have IO/APIC enabled and at least 2 CPU cores configured. Disabling IO/APIC prevents you from choosing more than 1 CPU core as it is the layer that allows your VM to send interrupts to more than one core. Most other tutorials say to enable PAE/NX. Though there is no reason to enable this option if you are fully operating your guest on a 64-Bit operating system.
Also make sure to disable Paravirtualization, as this enables your VM to know of its presence and communicate with other VMs - we do no want that (more weak points). Further, disable any visual acceleration (e.g. 3D-acceleration). The last two screenshots in "VM Advanced Setup Part 2" show how your storage should be structured (1 disk and 1 DVD space, for the .iso). Finally, it is essential to cap any connectivity to your host system. Therefore change the default "NAT" setting in the "Network" section to internal.
Now your VM is ready to be hardened!
Starting VBoxHardenedLoader
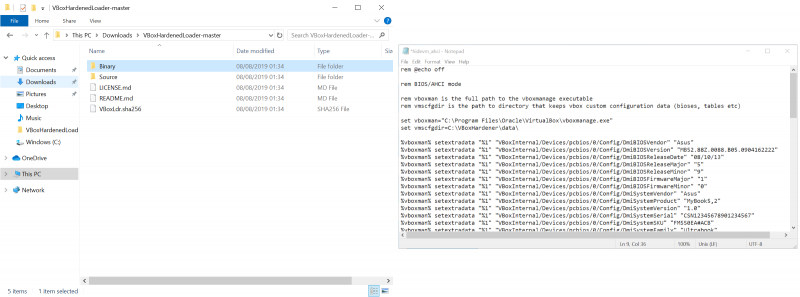
Before starting the VBoxHardenedLoader script we need to set it up to your host environment. First, go to the downloaded folder and copy the "Binary" folder into your C:\ directory or any other directory. In this tutorial, we copied it to C:\ and renamed the folder to "VBoxHardeneder". Next go to "C:\VBoxHardener\data\" and edit the hidevm_ahci file. Though be careful, if your guest VM does not use classic bios and uses EFI instead, make sure to pick the right script. Thus, here a short "what to choose, if" from the developer:
- hidevm_ahci is for VM with SATA/AHCI controller and classical BIOS
- hidevm_ide is for VM with IDE controller and classical BIOS
- hidevm_efiahci is for VM with SATA/AHCI controller and EFI
- hidevm_efiide is for VM with IDE controller and EFI
After you know which script is for you, edit it with notepad and change the following two variables:
- set vboxman="C:\Program Files\Oracle\VirtualBox\vboxmanage.exe"
- set vmscfgdir=C:\VBoxHardener\data\
Notice the "\" at the end of "data"! In our case, we set the first variable to our VirtualBox path (where the vboxmanage program is located) and the second to our previous Binary\data\ path.
Now open cmd as administrator and start your script, in our case hidevm_ahci.cmd with the name of your VM:
C:\VBoxHardener\data>hidevm_ahci.cmd win7
This script will utilize now the vboxmanage function of VirtualBox to further configure your VM. It will set specifications like your BIOS Version/Name to more realistic names (removing the default VBOX names).
Next go one directory up and start the install.cmd:
C:\VBoxHardener\data>cd ..
C:\VBoxHardener>install.cmd
This will run two different scripts now. The first is tsugumi.sys, which unloads the default drivers of VirtualBox and reloads preconfigured drivers that do not have any "VBOX" or "VB" in their name. Next, the loader.exe is run which is a service that ensures all registry and table entries match the new driver during runtime. Thus, always make sure to shut down your VM if you simply put it to sleep, make sure you shutdown the loader.exe with:
C:\VBoxHardener>loader.exe /s
This prevents it from getting stuck (if this happens, you need to reinstall all files related to the GitHub repository and your VM). Otherwise, you will keep on getting an error while trying to boot up your VM.
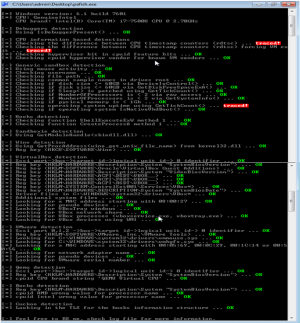
Finally, if you have completed all above steps you are now ready to start your VM and install Windows 7. After the installation boot up Pafish (either download it or you already have it in your .iso as we did). Pafish will now go through generic checks like RAM, disk size, CPU cores but also VirtualBox specific checks like Registry keys containing "VBOX". After running it you should have no more than 3 "traces":
- The first two should be the classic timestamp counter (rdtsc), which needs to be fixed by VirtualBox
- And getTickCount(), as our VM is fresh and it needs some runtime


