(Legacy) USB Vulnerability on Google Nest Hub
Disclaimer
Article in progress, this is not the final version. This tutorial has been patched by Google in December 2021 via OTA-update, now the booting sequence of the Recovery Mode does not work as intended for this exploit to work.
Summary
We want to change the OS of a Google Nest Hub 2. Generation by exploiting a vulnerability in the bootloader u-boot.
Requirements
- 1x Google Nest Hub, 2nd Generation
- 1x Raspberry Pi Pico
- 1x Powered Micro-USB Hub (NestUSB does not provide power)
- 2x Micro-USB cables
- 1x UART to USB
- 1x bootable USB Stick with Ubuntu 22.04 and the files from https://github.com/frederic/elaine-bootimg (Elaine bootimg gives privilege to use the Nest touchscreen for the Linux OS)
Description
Step 1
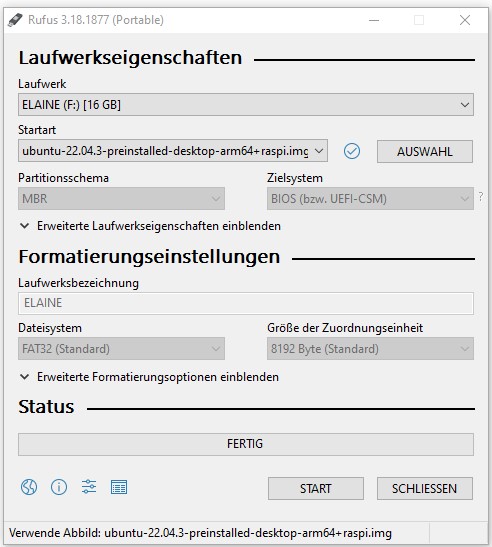
Flash an USB stick with Ubuntu 22.04, if you haven't done earlier.
echo foo
echo bar
Step 2
In order to be compatible with the touchscreen of the nest, we need to adjust some files in partition system boot.
Copy the following files from the repository https://github.com/frederic/elaine-bootimg in partition system-boot :
- u-boot-elaine.bin : U-Boot image for elaine
- u-boot-elaine.cmd : U-Boot environment file
- boot.img : Boot image (Kernel for elaine, DTB, initrd)
Step 3
The exploit is made possible because there is a stack overflow within the bootloader u-Boot, which happens with block sizes greater than 512 bytes. Most USB-Sticks only support 512 Bytes. The solution is taking a suitable microcontroller, in our case a Raspberry Pico, which is equipped with TinyUSB, which provides a Mass Storage device example code that can turn a Raspberry Pi Pico into a customizable USB flash drive. This Pico will be used to inject arbitrary payload into the stack memory and overwrite return address to execute the payload. However, the storage of the pico is very limited, hence we will have to hotswap the pico with our USB Stick, which contains all neccessary data to install the OS.
Step 4
For the Pico we will have to prepare the following:
1. Install dependencies Update the system: sudo apt-get update
Install dependencies: sudo apt install git sudo apt install openocd sudo apt install gcc-multilib sudo apt install build-essential sudo apt install python3-serial sudo apt install libudev-dev sudo apt install cmake gcc-arm-none-eabi libnewlib-arm-none-eabi build-essential sudo apt install libstdc++-arm-none-eabi-newlib
Create workspace, current location /home/ mkdir pico cd pico
Clone pico-sdk and update it, current location /home/pico/ git clone https://github.com/raspberrypi/pico-sdk.git --branch master cd pico-sdk git submodule update --init
In the Pico folder we do clone our chipicopwn, current location /home/pico/
sudo git clone https://github.com/frederic/chipicopwn chipicopwn
cd chipicopwn
Now we need the commands from the repository: Set the Path to wherever you saved your pico-sdk repository export PICO_SDK_PATH=/home/user/pico/pico-sdk/
!! If you have this in the home directory do not use relative paths, since this command is executed as root!
Flashing the program, current location /home/pico/chipicopwn It may be that a build folder already exists. It is recommended to delete it and make a new one, since some files may or may not work / flash as intended.
mkdir build cd build sudo cmake .. sudo make
Now the project should be built.
Now we need to boot the Pico in bootloader mode (by holding down the BOOTSEL button) and get the chipicopwn.uf2 on the pico device itself by copying it.
Now we should have two hardware components prepared:
The USB Stick with the Ubuntu Image optimized for touchscreen and the Raspberry Pico with the modified bootloader.
Step 4
Remove the lid underneath the Nest Hub base to expose USB port Connect the Raspberry Pico to Nest Hub (through powered-hub or Y-cable because the USB port does not provide power) Hold Volume Down + Volume Up + Mute buttons while powering on the Nest Hub Once CHIPICOPWN logo appears on screen, replace the Raspberry Pico with USB flash drive
Now you can install Ubuntu on your Google Nest.
Used Hardware
Nest_Hub_2nd_Generation Raspberry Pi Pico Powered Micro-USB Hub Micro-USB cable optional for log insight: UART to USB Adapter
Courses
- WFP2 (2023)
