Difference between revisions of "Black Arch VMware Installation"
Jump to navigation
Jump to search
VHorvathova (talk | contribs) (Created page with "== Summary == In this documentation, you will find the necessary steps to set up the Linux distribution Black Arch as a virtual machine in VMware Workstation. == Requiremen...") |
VHorvathova (talk | contribs) |
||
| (8 intermediate revisions by the same user not shown) | |||
| Line 5: | Line 5: | ||
== Requirements == | == Requirements == | ||
* | * Black Arch Linux Image File: Black Arch Linux 2020.12 amd64 full ISO (download from https://blackarch.org/downloads.html ) | ||
* VMware Workstation (15.5 is used in this tutorial) | * VMware Workstation (15.5 is used in this tutorial) | ||
| Line 11: | Line 11: | ||
=== ISO file download === | === ISO file download === | ||
Download the newest | Download the newest Black Arch Linux ISO file from the official website. | ||
=== VMware setup === | === VMware setup === | ||
| Line 17: | Line 17: | ||
Open VMware Workstation and follow these configurations for a successful installation: | Open VMware Workstation and follow these configurations for a successful installation: | ||
* Click on <i>File</i> -> <i>New Virtual Machine</i>; a window with the configuration will pop up | * Click on <i>File</i> -> <i>New Virtual Machine</i>; a window with the configuration will pop up | ||
* Choose <i> | * Choose <i>Custom</i> as the type of configuration and click <i>Next></i> | ||
* Choose <i>Installer disc image file (iso)</i> and find path to the downloaded | * Choose <i>Installer disc image file (iso)</i> and find path to the downloaded Black Arch ISO file, then click <i>Next></i> | ||
* As <i>Guest operating system</i> select Linux and set the <i>Version</i> to | * As <i>Guest operating system</i> select Linux and set the <i>Version</i> to <i>Other Linux 5.x or later kernel 64-bit</i>, then click <i>Next></i> | ||
* Set <i> | * Set up the VM name, path, and at the <i>processor configuration</i>, go for 1 processor with 2 cores per processor | ||
* Set the <i>Memory for this virtual machine</i> to 1024 MB and for <i>network type</i> choose NAT | |||
* For <i>SCSI Controller</i> choose the LSI Logic (recommended) and for <i>Disk Type</i> choose SCSI (recommended) | |||
* | * Choose "Create a new virtual disk" and set the<i>Maximum Disk Size</i> to 50 GB; | ||
* Choose <i>Store virtual disk as a single file</i> (or <i>Split virtual disk into multiple files</i> if that suits your needs better), then click <i>Next></i> and <i>Finish</i> | |||
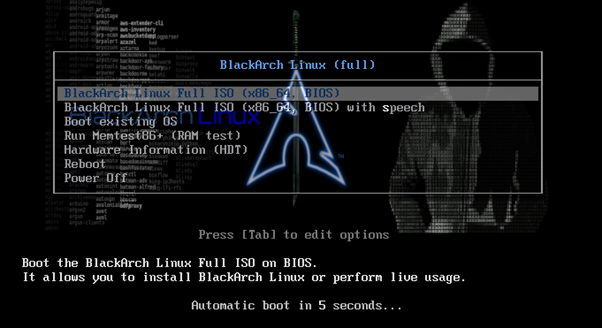
Now you're all set: | |||
[[File:Blackarch_installer.png]] | |||
[[File: | Your first login must be as: <br> | ||
 ➥ user: <b>root</b> <br> | |||
 ➥ password: <b>blackarch</b> <br> | |||
Afterwards, you may change the password, create new users etc. | |||
== Used Hardware == | == Used Hardware == | ||
Latest revision as of 15:27, 12 April 2021
Summary
In this documentation, you will find the necessary steps to set up the Linux distribution Black Arch as a virtual machine in VMware Workstation.
Requirements
- Black Arch Linux Image File: Black Arch Linux 2020.12 amd64 full ISO (download from https://blackarch.org/downloads.html )
- VMware Workstation (15.5 is used in this tutorial)
Steps
ISO file download
Download the newest Black Arch Linux ISO file from the official website.
VMware setup
Open VMware Workstation and follow these configurations for a successful installation:
- Click on File -> New Virtual Machine; a window with the configuration will pop up
- Choose Custom as the type of configuration and click Next>
- Choose Installer disc image file (iso) and find path to the downloaded Black Arch ISO file, then click Next>
- As Guest operating system select Linux and set the Version to Other Linux 5.x or later kernel 64-bit, then click Next>
- Set up the VM name, path, and at the processor configuration, go for 1 processor with 2 cores per processor
- Set the Memory for this virtual machine to 1024 MB and for network type choose NAT
- For SCSI Controller choose the LSI Logic (recommended) and for Disk Type choose SCSI (recommended)
- Choose "Create a new virtual disk" and set theMaximum Disk Size to 50 GB;
- Choose Store virtual disk as a single file (or Split virtual disk into multiple files if that suits your needs better), then click Next> and Finish
Now you're all set:
Your first login must be as:
➥ user: root
➥ password: blackarch
Afterwards, you may change the password, create new users etc.
Used Hardware
- Virtual machine in VMWare: 4 vCPUs, 8GB RAM, 100GB SCSI HDD
