ConBee ZigBee USB Gateway: Usage
Summary
This is a description of how to set up and use a ConBee ZigBee USB Gateway device to sniff out and/or analyse ZigBee network traffic between smart home devices.
Requirements
Operating system:
- Ubuntu 18.04
Applications:
- Wireshark
- ZShark (Interface between sniffer and Wireshark, available [here]
- Smart Home Management App, e.g. Philips Hue for Android
Network traffic generating devices, e.g.
- Philips Hue Bridge
- Philips Hue White LED
Sniffing tool
- ConBee ZigBee USB Gateway
In order to complete these steps, it is recommended to be familiar with Wireshark.
Description
Step 0: ZigBee Smart Home Provision
Be sure to have permission to hack into the ZigBee network you want to analyse. Even better, set up your own network to generate some traffic. Minimal requirements: 1 bridge and 1 connected smart home device, such as an LED lamp, preferably with an additional app e.g. for your phone, to control/manage the smart home devices.
Step 1: ConBee Setup
Plug ConBee into a USB Port
Install the firmware using ZShark
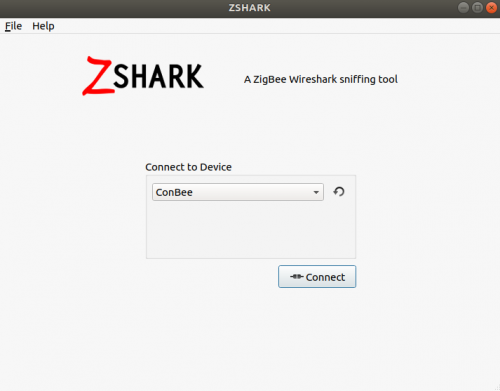
Open ZShark. You will see this window:
Select "ConBee" and click "Connect".
If the dialog tells you there is "No or wrong firmware found", and pressing the "Install Firmware" button doesn't prompt you to the next dialog, make sure no other USB devices are connected to your computer and try again.
If it still doesn't change, you can also install the firmware manually. For this open a terminal and change into the ZShark-folder (that is where you have installed the application) and run this command (as root):
GCFFlasher_internal -d /dev/ttyUSB0 -f /usr/share/zshark/fw/sniffer_v1_0.bin
where
- /dev/ttyUSB0 is the path to your device
- /usr/share/zshark/fw/sniffer_v1_0.bin is the path to the firmware you want to install
Both paths may differ from this solution. Make sure you look up the correct paths on your own system and use them accordingly.
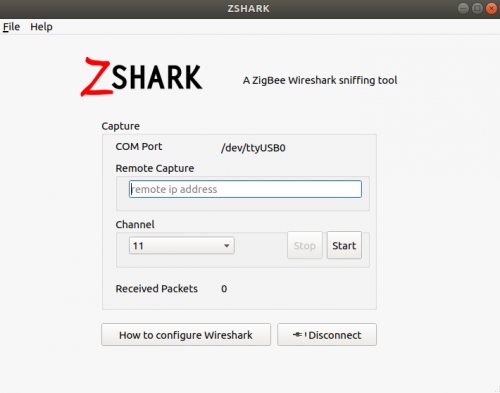
If everything worked fine, you should see a dialogue like this
where the path in the COM port identifier shows you the sniffer was detected correctly.
The remote capture IP is to use if you decide to send the captured data to Wireshark on another machine. In my case this was not necessary, as I used Wireshark on the same device.
You can choose a ZigBee channel to sniff, channel 11 is the default ZigBee channel, so there you find your traffic unless you configured your network otherwise.
To start capturing traffic, click "Start". You should see the number identified by "Received Packets" in the dialogue to increase immediately.
Step 2: Wireshark Network Traffic
[to be continued]
Used Hardware
ConBee ZigBee USB Gateway Philips Hue Bridge 2.0, Gateway Philips Hue White LED E27 9.5W/827, white
Courses
- (nothing here yet)

