Difference between revisions of "USB Armory"
| Line 1: | Line 1: | ||
== | == Introduction == | ||
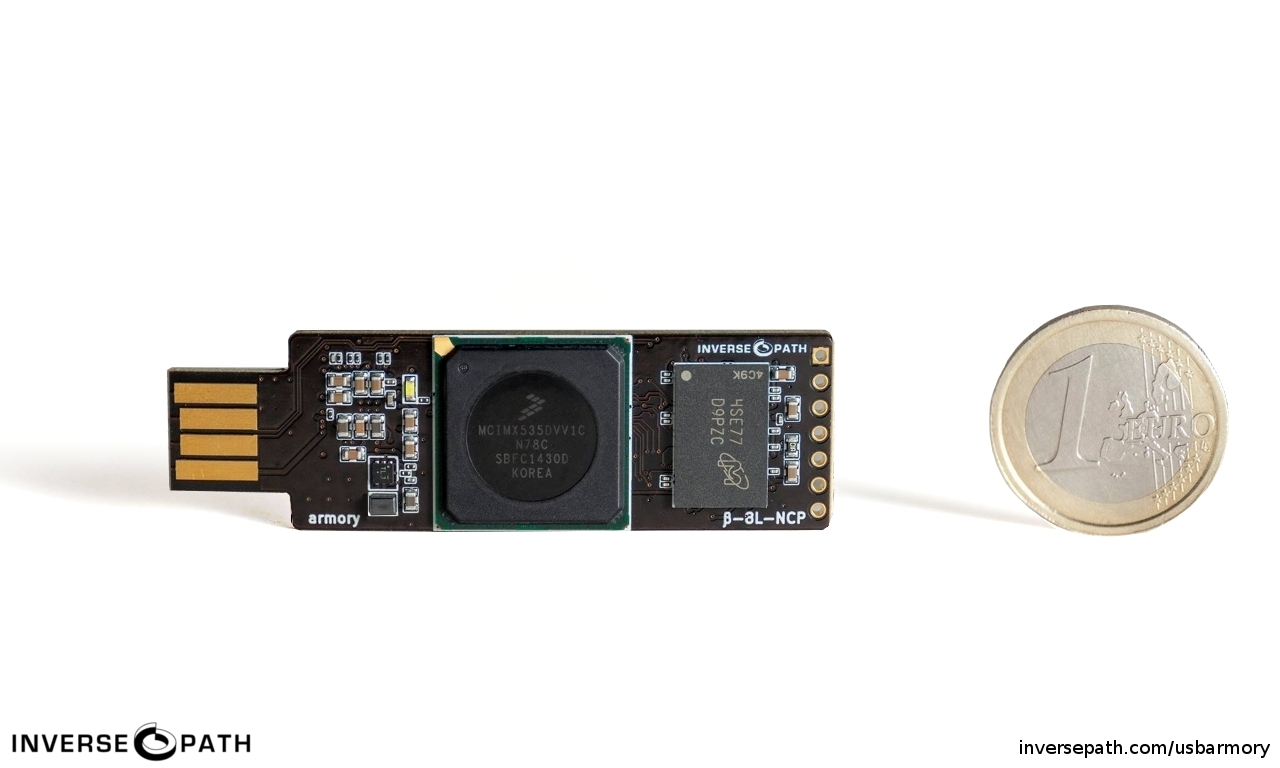
Launched in 2014, USB Armory is a small and portable USB-sized personal computer created by Andrea Barisani. Originally intended to be produced as a secure data store, USB Armory managed to become a versatile device with the development of its Hardware and Software. With its hardware sufficient as a computer, it can be configured on an installed Linux system that boots and thus powers up when plugged into any computer, for example, so that data not only ends up on an encrypted partition, but is automatically re-encrypted when transferred. | |||
[[File:Usbarmory coin.jpeg]] | |||
== Design Goals == | |||
* The microSD hinge replacement with a push/pull slot. | |||
* Real USB plugs, plug + socket for integrated host adapter. | |||
* Enclosure design right from the beginning. | |||
* | * Full internal and third-party security audit for HABv4 and chain of trust. | ||
* | * Addition of built-in eMMC storage and external crypto authenticator. | ||
* Bluetooth communication. | |||
Hardware: | |||
* SoC: NXP i.MX6ULZ ARM® Cortex™-A7 900 MHz | |||
* | * RAM: 512 MB DDR3 | ||
* Storage: internal 16 GB eMMC + external microSD | |||
* | * Bluetooth module: u-blox ANNA-B112 BLE | ||
* USB-C ports: DRP (Dual Role Power) receptacle + UFP (Upstream Facing Port) plug, USB 2.0 only (no * video support) | |||
* | * LEDs: two | ||
* Slide switch: for boot mode selection between eMMC and microSD | |||
* | * External security elements: Microchip ATECC608A + NXP A71CH | ||
* Physical size: 66 mm x 19 mm x 8 mm (without enclosure, including USB-C connector) | |||
* | * Enclosure: included with all units for device protection | ||
Software: | |||
* | * Boots from onboard eMMC or microSD (or via USB serial downloader) | ||
* Native Linux support – creating boot images is easy | |||
* Precompiled images are available for Debian 9 (Stretch) and Arch Linux, with more on the way | |||
* USB device emulation (CDC Ethernet, mass storage, HID, etc.) | |||
And How to connected: | |||
* USB 2.0 over USB-C plug to host with full device emulation | |||
* USB 2.0 over USB-C receptacle for the additional devices or as a connection to host | |||
* Full TCP/IP connection to/from USB armory via USB CDC Ethernet emulation | |||
* Flash drive functionality via USB mass storage device emulation | |||
* Serial communication over USB or physical UART using the Debug Board | |||
* Wireless connectivity over BLE | |||
== Application examples == | == Application examples == | ||
* mass storage device with advanced features such as automatic | |||
* encryption, virus scanning, host authentication and data self-destruct | |||
* OpenSSH client and agent for untrusted hosts (kiosk) | |||
* router for end-to-end VPN tunneling, Tor | |||
* password manager with integrated webserver | |||
* electronic wallet (e.g. pocket Bitcoin wallet) | |||
* authentication token | |||
* portable penetration testing platform | |||
* low-level USB security testing | |||
== Getting Started == | |||
=== Boot Mechanisms === | |||
In order for USB Armory to work in a certain operating system, either the microSD card inserted in the device or the MMc (16 GB) in it must be booted. Mk II supports 3 boot mechanisms: | |||
[[File:armory-mark-two-boot-switch.png]] | |||
* | * internal 16GB eMMC | ||
* external microSD | |||
* USB Serial Download Protocol (SDP) | |||
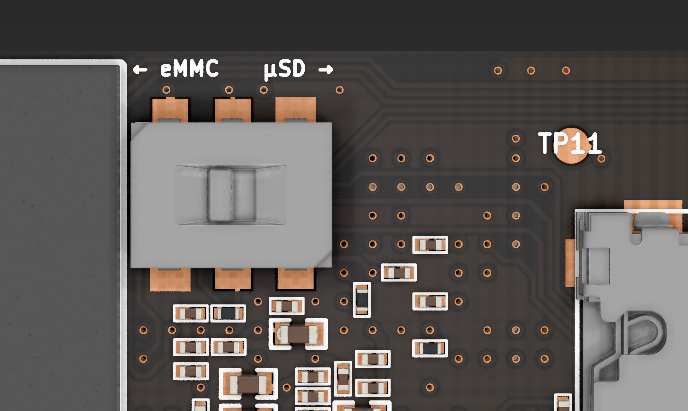
if we want to boot the MMC we have to drag the inverter to the left, and if we want to boot the SD micro card we have to drag the inverter to the right. If we want to put it in SDP mode we have to leave it in the middle. | |||
How to boot a microSD card? | |||
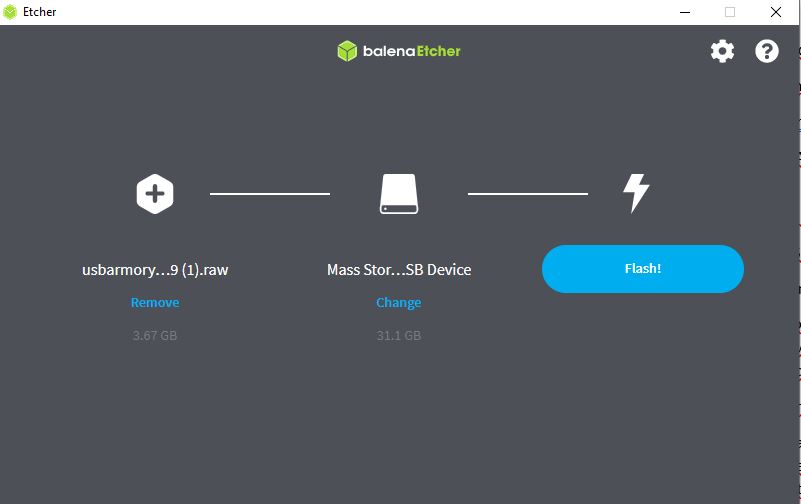
USB Armory has a valid Pre-Image file for each operating system on its own page. Optionally, booting can be done either manually or by downloading the appropriate file and flashing the microSD card (before it is inserted into the USB Armory) with balenaEtcher software. | |||
First Step: | |||
[[File: | [[File:Preimages.jpeg]] | ||
2. Step: | |||
[[File:balenaET.jpeg]] | |||
=== Host communication === | |||
Since the booted microSD card is ready in the operating system, Host communication can be started. | |||
# look up the name of the USB virtual Ethernet interface which was created by the USB Armory | # look up the name of the USB virtual Ethernet interface which was created by the USB Armory | ||
| Line 71: | Line 73: | ||
# bring the USB virtual Ethernet interface up | # bring the USB virtual Ethernet interface up | ||
/sbin/ip link set usb0 up | |||
# set the host IP address | # set the host IP address | ||
/sbin/ip addr add 10.0.0.2/24 dev usb0 | |||
# enable masquerading for outgoing connections towards wireless interface | # enable masquerading for outgoing connections towards wireless interface | ||
sudo /sbin/iptables -t nat -A POSTROUTING -s 10.0.0.1/32 -o <actual interface on host machine> -j MASQUERADE | sudo /sbin/iptables -t nat -A POSTROUTING -s 10.0.0.1/32 -o <actual interface on host machine> -j MASQUERADE | ||
# enable masquerading for outgoing connections towards wireless interface | |||
/sbin/iptables -t nat -A POSTROUTING -s 10.0.0.1/32 -o wlan0 -j MASQUERADE | |||
# enable IP forwarding | # enable IP forwarding | ||
sudo sysctl -w net.ipv4.ip_forward=1 | sudo sysctl -w net.ipv4.ip_forward=1 | ||
#connect to USB Armory via ssh - password: | #connect to USB Armory via ssh - password: USB armory | ||
ssh usbarmory@10.0.0.1 | ssh usbarmory@10.0.0.1 | ||
#install Lynx Web browser on USB Armory | #install Lynx Web browser on USB Armory | ||
sudo apt-get install Lynx | sudo apt-get install Lynx | ||
== References == | == References == | ||
* https://hackerwarehouse.com/product/usb-armory-mkii/ | |||
* https://github.com/f-secure-foundry/usbarmory/wiki | |||
* https://elvis.science/?w=USB_Armory | |||
* https://genode.org/documentation/articles/trustzone | * https://genode.org/documentation/articles/trustzone | ||
* https://www.f-secure.com/en/consulting/foundry/usb-armory | * https://www.f-secure.com/en/consulting/foundry/usb-armory | ||
* https://inversepath.com/usbarmory_mark-one.html | * https://inversepath.com/usbarmory_mark-one.html | ||
* https:// | * https://www.golem.de/news/usb-armory-linux-stick-fuer-sichere-daten-1412-111374.html | ||
[[Category:Documentation]] | [[Category:Documentation]] | ||
Revision as of 11:53, 20 December 2021
Introduction
Launched in 2014, USB Armory is a small and portable USB-sized personal computer created by Andrea Barisani. Originally intended to be produced as a secure data store, USB Armory managed to become a versatile device with the development of its Hardware and Software. With its hardware sufficient as a computer, it can be configured on an installed Linux system that boots and thus powers up when plugged into any computer, for example, so that data not only ends up on an encrypted partition, but is automatically re-encrypted when transferred.

Design Goals
- The microSD hinge replacement with a push/pull slot.
- Real USB plugs, plug + socket for integrated host adapter.
- Enclosure design right from the beginning.
- Full internal and third-party security audit for HABv4 and chain of trust.
- Addition of built-in eMMC storage and external crypto authenticator.
- Bluetooth communication.
Hardware:
- SoC: NXP i.MX6ULZ ARM® Cortex™-A7 900 MHz
- RAM: 512 MB DDR3
- Storage: internal 16 GB eMMC + external microSD
- Bluetooth module: u-blox ANNA-B112 BLE
- USB-C ports: DRP (Dual Role Power) receptacle + UFP (Upstream Facing Port) plug, USB 2.0 only (no * video support)
- LEDs: two
- Slide switch: for boot mode selection between eMMC and microSD
- External security elements: Microchip ATECC608A + NXP A71CH
- Physical size: 66 mm x 19 mm x 8 mm (without enclosure, including USB-C connector)
- Enclosure: included with all units for device protection
Software:
- Boots from onboard eMMC or microSD (or via USB serial downloader)
- Native Linux support – creating boot images is easy
- Precompiled images are available for Debian 9 (Stretch) and Arch Linux, with more on the way
- USB device emulation (CDC Ethernet, mass storage, HID, etc.)
And How to connected:
- USB 2.0 over USB-C plug to host with full device emulation
- USB 2.0 over USB-C receptacle for the additional devices or as a connection to host
- Full TCP/IP connection to/from USB armory via USB CDC Ethernet emulation
- Flash drive functionality via USB mass storage device emulation
- Serial communication over USB or physical UART using the Debug Board
- Wireless connectivity over BLE
Application examples
- mass storage device with advanced features such as automatic
- encryption, virus scanning, host authentication and data self-destruct
- OpenSSH client and agent for untrusted hosts (kiosk)
- router for end-to-end VPN tunneling, Tor
- password manager with integrated webserver
- electronic wallet (e.g. pocket Bitcoin wallet)
- authentication token
- portable penetration testing platform
- low-level USB security testing
Getting Started
Boot Mechanisms
In order for USB Armory to work in a certain operating system, either the microSD card inserted in the device or the MMc (16 GB) in it must be booted. Mk II supports 3 boot mechanisms:
- internal 16GB eMMC
- external microSD
- USB Serial Download Protocol (SDP)
if we want to boot the MMC we have to drag the inverter to the left, and if we want to boot the SD micro card we have to drag the inverter to the right. If we want to put it in SDP mode we have to leave it in the middle. How to boot a microSD card? USB Armory has a valid Pre-Image file for each operating system on its own page. Optionally, booting can be done either manually or by downloading the appropriate file and flashing the microSD card (before it is inserted into the USB Armory) with balenaEtcher software. First Step:
2. Step:
Host communication
Since the booted microSD card is ready in the operating system, Host communication can be started.
# look up the name of the USB virtual Ethernet interface which was created by the USB Armory
ifconfig
# bring the USB virtual Ethernet interface up
/sbin/ip link set usb0 up
# set the host IP address
/sbin/ip addr add 10.0.0.2/24 dev usb0
# enable masquerading for outgoing connections towards wireless interface
sudo /sbin/iptables -t nat -A POSTROUTING -s 10.0.0.1/32 -o <actual interface on host machine> -j MASQUERADE
# enable masquerading for outgoing connections towards wireless interface
/sbin/iptables -t nat -A POSTROUTING -s 10.0.0.1/32 -o wlan0 -j MASQUERADE
# enable IP forwarding
sudo sysctl -w net.ipv4.ip_forward=1
#connect to USB Armory via ssh - password: USB armory
ssh usbarmory@10.0.0.1
#install Lynx Web browser on USB Armory
sudo apt-get install Lynx
References
- https://hackerwarehouse.com/product/usb-armory-mkii/
- https://github.com/f-secure-foundry/usbarmory/wiki
- https://elvis.science/?w=USB_Armory
- https://genode.org/documentation/articles/trustzone
- https://www.f-secure.com/en/consulting/foundry/usb-armory
- https://inversepath.com/usbarmory_mark-one.html
- https://www.golem.de/news/usb-armory-linux-stick-fuer-sichere-daten-1412-111374.html


